Table of Contents

GIFs aren’t just for cats anymore! At Baremetrics, we use GIFs to announce and explain new features on Twitter and in Intercom. Follow along and I’ll show you, start to finish, how to make them for your own product.
This isn’t new territory–other companies like Slack and Invision have been making awesome GIFs for a while now and served as inspiration for me to get into the game as well.
Why GIFs?
So, why use GIFs for announcing new features? Simple–they have a low barrier to entry. On Twitter watching a GIF takes only a click or a tap.
In Intercom, they play automatically, which is a great way to get a user to improve your in-app message.
We find that including a GIF gets us higher engagement on both Twitter and Intercom, making it a great way to draw attention to new features and better engage your users. Hurrah!
Okay, I’m convinced. Now what?!
To get started, you need three things: Screenflow, Photoshop and a new or existing feature to highlight.
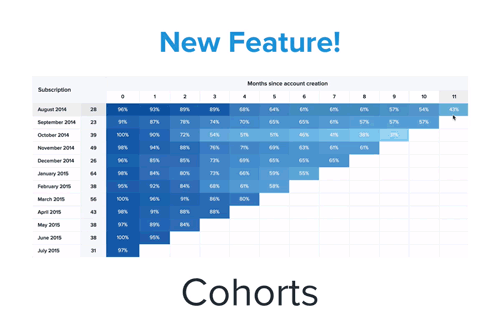
To show you my process for these, I’ll walk you through creating an account feature announcement GIF! We’re about to rollout a much requested feature in Baremetrics: Customer Cohorts (which you can see in action in our demo). Let’s jump in and I’ll show you the process I use, and some of the effects I employ, to make a super awesome GIF!
Getting ready to make your GIF
There are two basic things you need to do to set yourself up to make a great GIF.
Remove unnecessary stuff
Use Chrome Dev tools to remove any unnecessary UI elements to better draw the viewer’s attention to where it needs to be. This is how I made the Date Picker GIF where the Calendar appears to float in space without the surrounding UI elements.
Capture the video
Next up: capture the video! This is what you need Screenflow for.
Mind the GIF requirements!
I know, I know… you want to jump into the fun editing part. But before you do, you need to be mindful of quite a few limitations of the GIF format.
I learned a lot of the lessons the hard way, spending hours editing awesome looking videos only to discover they don’t look so awesome when I tried to cram them into a 5MB GIF file. Oh yeah, Twitter has a 5MB limit for GIFs. So these steps are important.
- Use as few colors as possible. For file size considerations, your GIF is only going to have 256 colors to work with. Isolating the UI element you want to highlight in the previous step comes in handy here, as you’re likely to then limit the number of colors in the GIF.
- Avoid transitions that alter the colors. Transitions that fade elements in/out do so by changing the color. When you fade in something that’s “blue” it’s actually going to be a bunch of different shades of blue.
- Keep it under 10 seconds. There’s no hard and fast rule here, but it gets difficult to stay under the 5MB limit for Twitter once you exceed 10 seconds.
Editing time!
Okay! It’s time to take the raw screen capture footage and make it purrty. I’m going to show you some of my go-to effects that I do in Screenflow.
These are created using Video Actions. Think of it like you’re a cinematographer with a video camera. You set where you want the camera to start the movement, and where you want it to be when it ends. This allows you to pan across the screen or quickly zoom into something you’d like to focus the viewer’s attention on.
Zoom Zoom Zoom
The bread and butter of screencasts: the zoom. Zoom in to highlight something in particular and make it more visible to the user. I like my zooms to be quick and snappy and usually set them to a duration of 0.3 seconds.
The Reveal
Imagine Vanna White revealing the Wheel of Fortune board. Like this: 💁. That’s essentially what you’re doing here. Pan across whatever it is that you’re highlighting. Feel free to make “oooh” and “ahhh” sounds while you’re doing this.
Skewed Perspective
Use this sparingly. It’s one tool in your toolbelt and I’ve noticed that folks tend to overdo it a bit. You want to draw attention to your content, not make the viewer feel like they’ve got their head on sideways inside a House of Mirrors.
Zooming Text
Now we’re starting to get fancy. This is a fun way to add some visual flare while still not adding any addition colors (and thus file size).
Zoom to Color Transition
More fun visual flare!
The big reveal…
And here’s the final product, which makes use of all the effects I detailed above.
Converting to GIF
The next step is to turn your video file into a GIF. I’m using the Photoshop method outlined by Andy Orsow over at Invision who put together a great article on the subject, along with some other tips for making the GIF itself. I recommend checking it out as well.
Import to Video Layers
Head up to the File Menu and choose Import > Video Frames to Layers.

Select From Beginning to End in the Range To Import area and be sure “Make Frame Animation” is checked. Click OK.

Export that puppy!
Next step is to head up to the File Menu again and choose Export > Save for Web. In newer versions of Photoshop it’ll have Legacy in parentheses.

Warning! Photoshop is about to get painfully slow. I guess that’s why this feature is considered “Legacy” now.

There are some settings you can play with to adjust the file size: Image Size and Colors being my main go-tos.
For Image Size Twitter resizes horizontally and crops vertically all image previews to a resolution of 440×220, so there’s no sense in making your GIF much bigger than that. In this case I chose a width of 500 pixels so that the GIF would be a bit larger when used outside of Twitter.
If you took care in keeping the length of your clip quite short, you should be able to set Color to the 256 max. Scaling that down to 128 is an option if your GIF is an option, but it’ll result in a much lower quality GIF.

As you make adjustments to the export settings, you can see how big your final GIF will be at the bottom left hand corner of the window. Only 2.2MB? Nice!
When you’re ready, click the big blue Save button.
Additional Tips and Resources
GIFs are a fantastic tool, but they’re not always the best choice. If you’re say embedding short clips on your website or a blog post, your best bet is something like a Wistia video. Had I used GIFs for this post, it’d have been about 50MB–not exaaactly feasible.
Here are a few other resources and bits of inspiration to check out.
- Screenflow Documentation & Tutorials
- 7 Tips for Designing Awesome Animated GIFs
- Date Picker GIF Tweet
- Revenue Breakout GIF Tweet
- Data Intervals GIF Tweet
- Archive Plans GIF Tweet
- Annotations GIF Tweet