Table of Contents
Welcome to Baremetrics! We’re glad you’re here 🙂
By now, you’ve signed up and connected your data source(s). Now what?
Below you’ll find instructions for the five most essential steps of setting up your Baremetrics account.
In total, these steps should take you about 30-45 minutes; but once completed, you’ll have access to unique insights that will save you hours in the future.
Want hands-on help with getting set up? Book a session with our Customer Success team here.
Landed here and not sure where you are? Learn more about Baremetrics and how we help SaaS businesses grow here.
Step 1: Invite Your Team
Growing a SaaS company is hard and you can’t do it alone. The first thing you should do in Baremetrics is add the appropriate team members so everyone can see the same data.
This might be your CEO, your finance team, marketing, sales and customer success team. Each member of the team will be able to find helpful data and insights. From customer acquisition to managing churn, Baremetrics is going to play a role across the company.
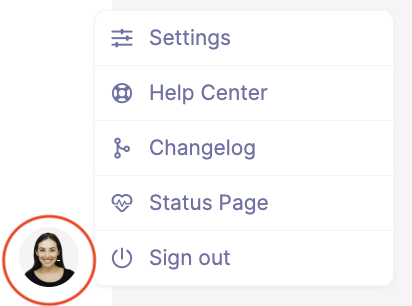
Step 1: Log into your Baremetrics account and click on your account icon in the bottom left corner
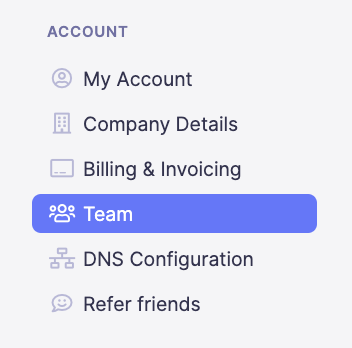
Step 2: Click Team in the menu
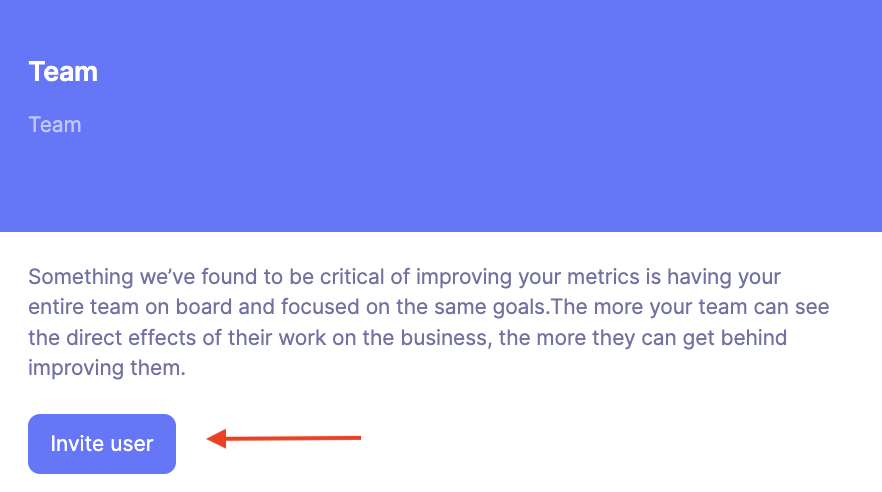
Step 3: Click “Invite User”
Step 4: Enter your team mates name and email address and click “save changes”
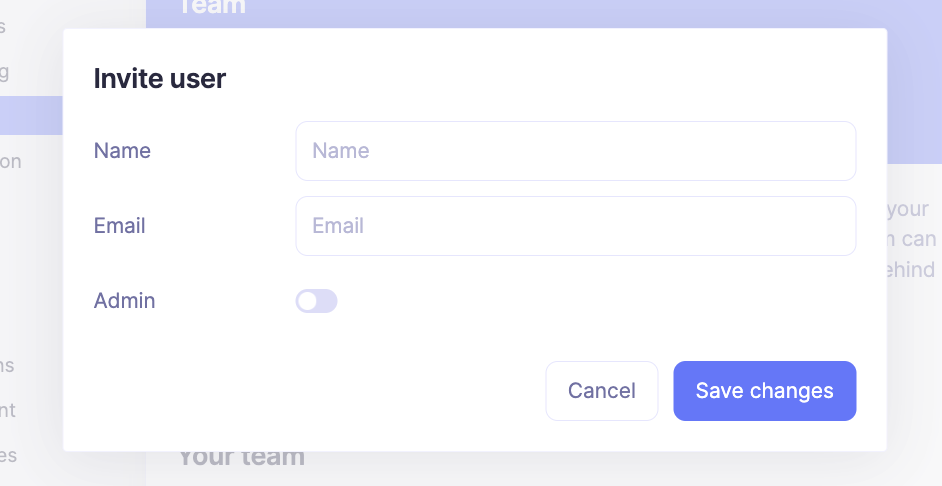
Note: Only account admins are able to invite, remove and change the permission level of team members. Any developers using the API will need to be an admin.
Step 2: Set up Customer Segments
Now that you have the right people invited to Baremetrics, you can get started on setting up your account to gather customer insights.
The first step is to start creating segments of your customers so you can track them all separately and learn more about them.
Step 1: Sign into your Baremetrics account
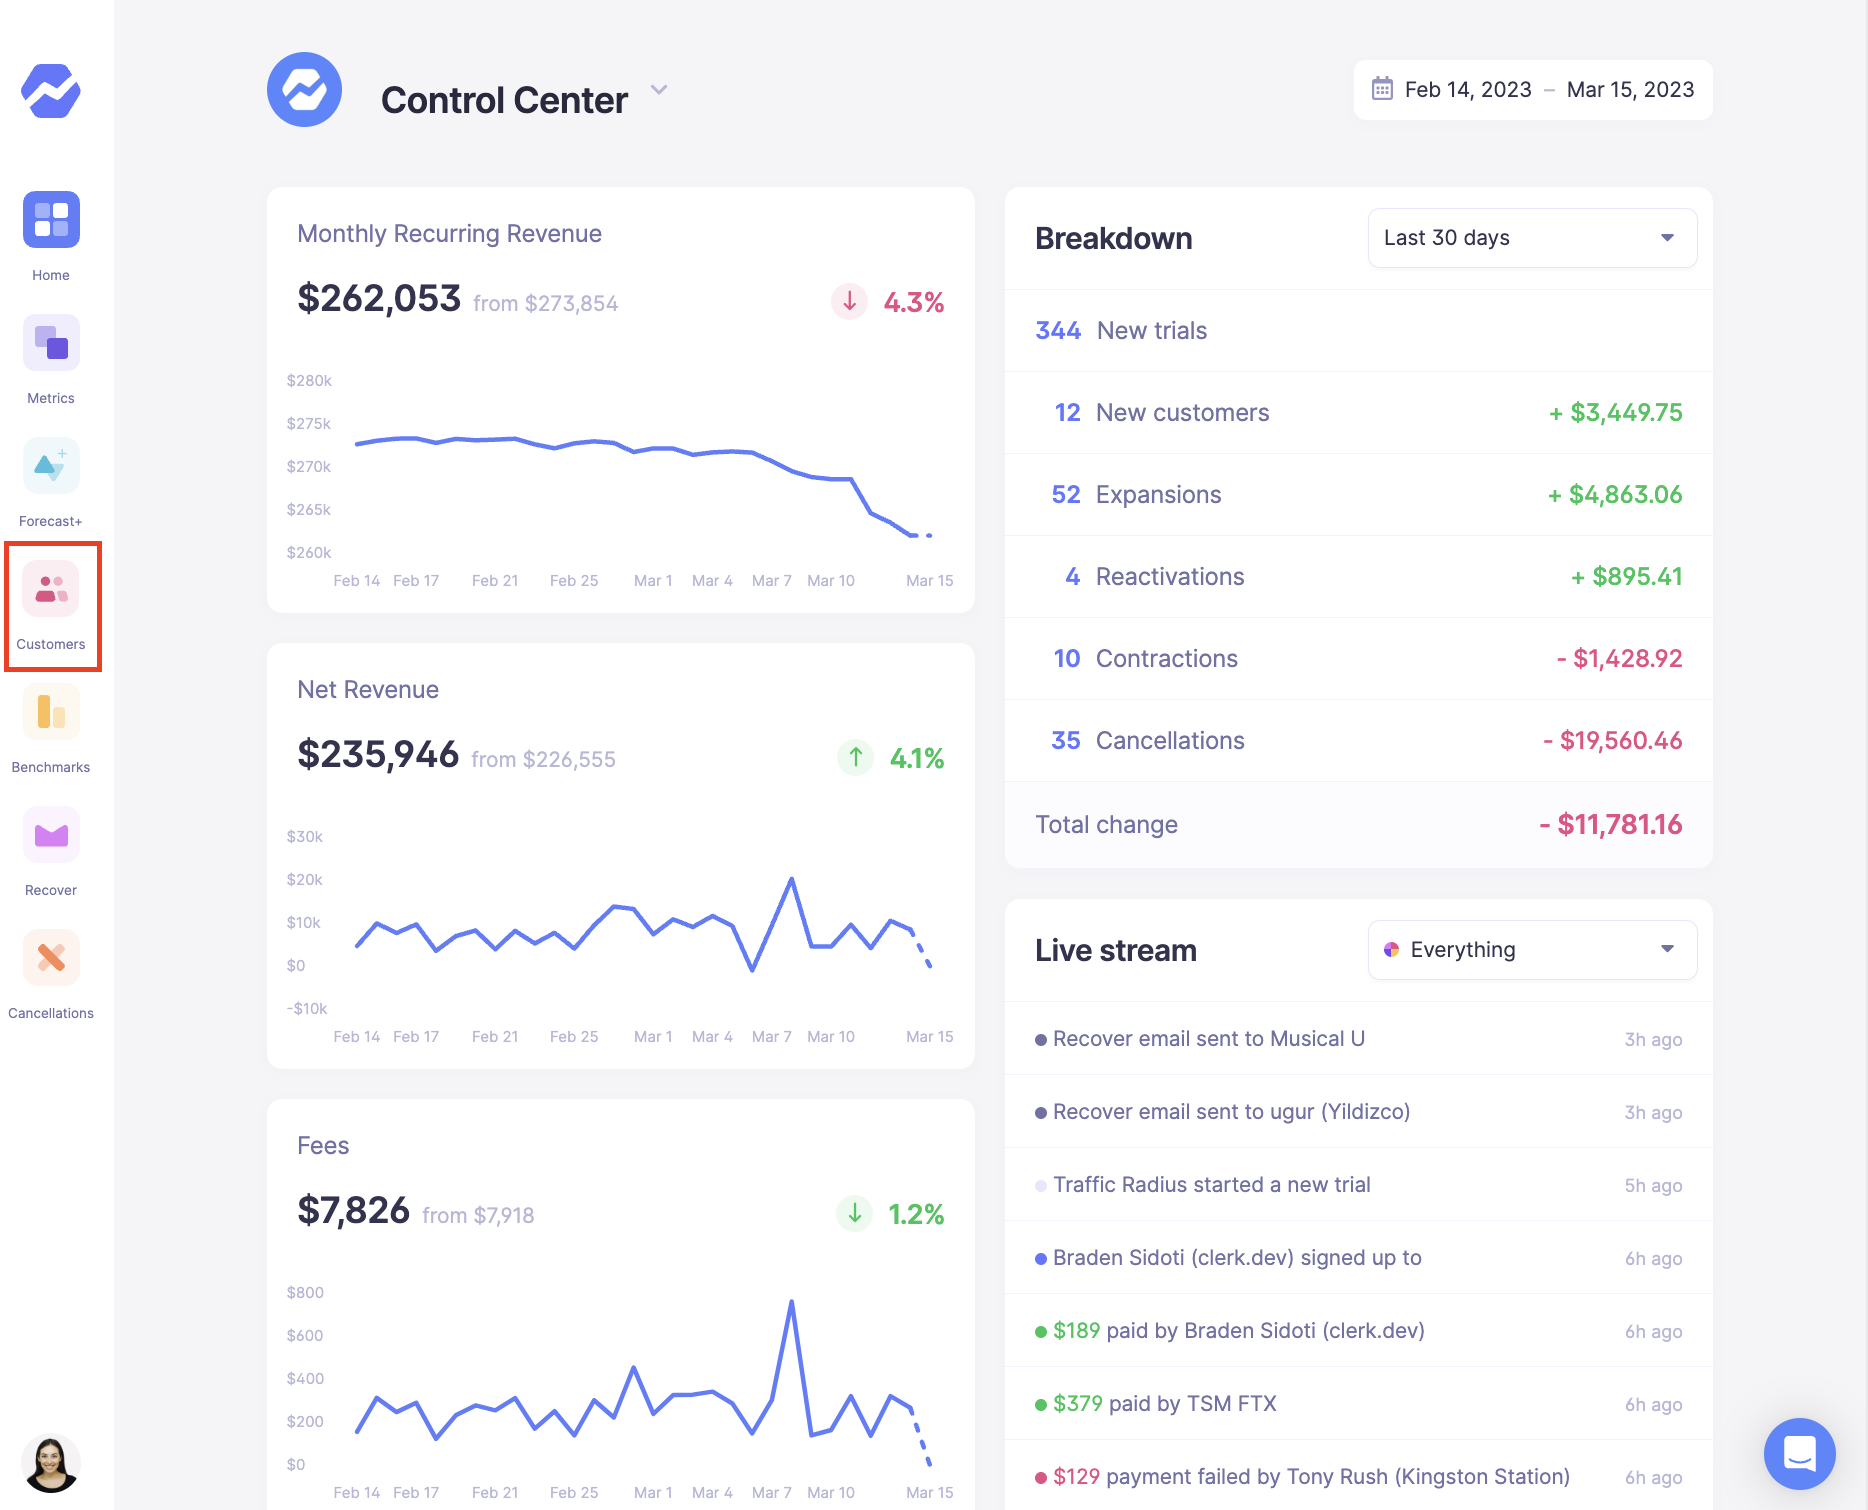
Step 2: Click the red Customers icon from the menu on the left
Step 3: Click “Add Filter”
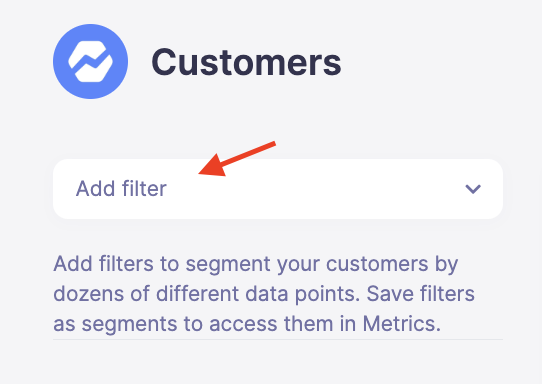
Step 4: Add as many filters as you need in order to get the list of customers you want.
Step 5: Click Save
Step 6: Name your segment and click save
BOOM! Now you can filter your dashboards and reports and see the data you want on that specific group of customers. Go back and make as many as you need.
Step 3: Create Custom Dashboards
Your segments are set up which means you’re ready to dig deeper! Setting up your own custom dashboards is super easy and is going to give you the exact view you are looking for.
Do you want to keep a close eye on churn? Add it. Want to see how many new trials you get? Add it. Feel free to break them down by segment or time or whatever you need to see to get that quick glimpse into what is important for your company.
Step 1: Log into your Baremetrics account
Step 2: On the top of the Control Center select “Create new dashboard”
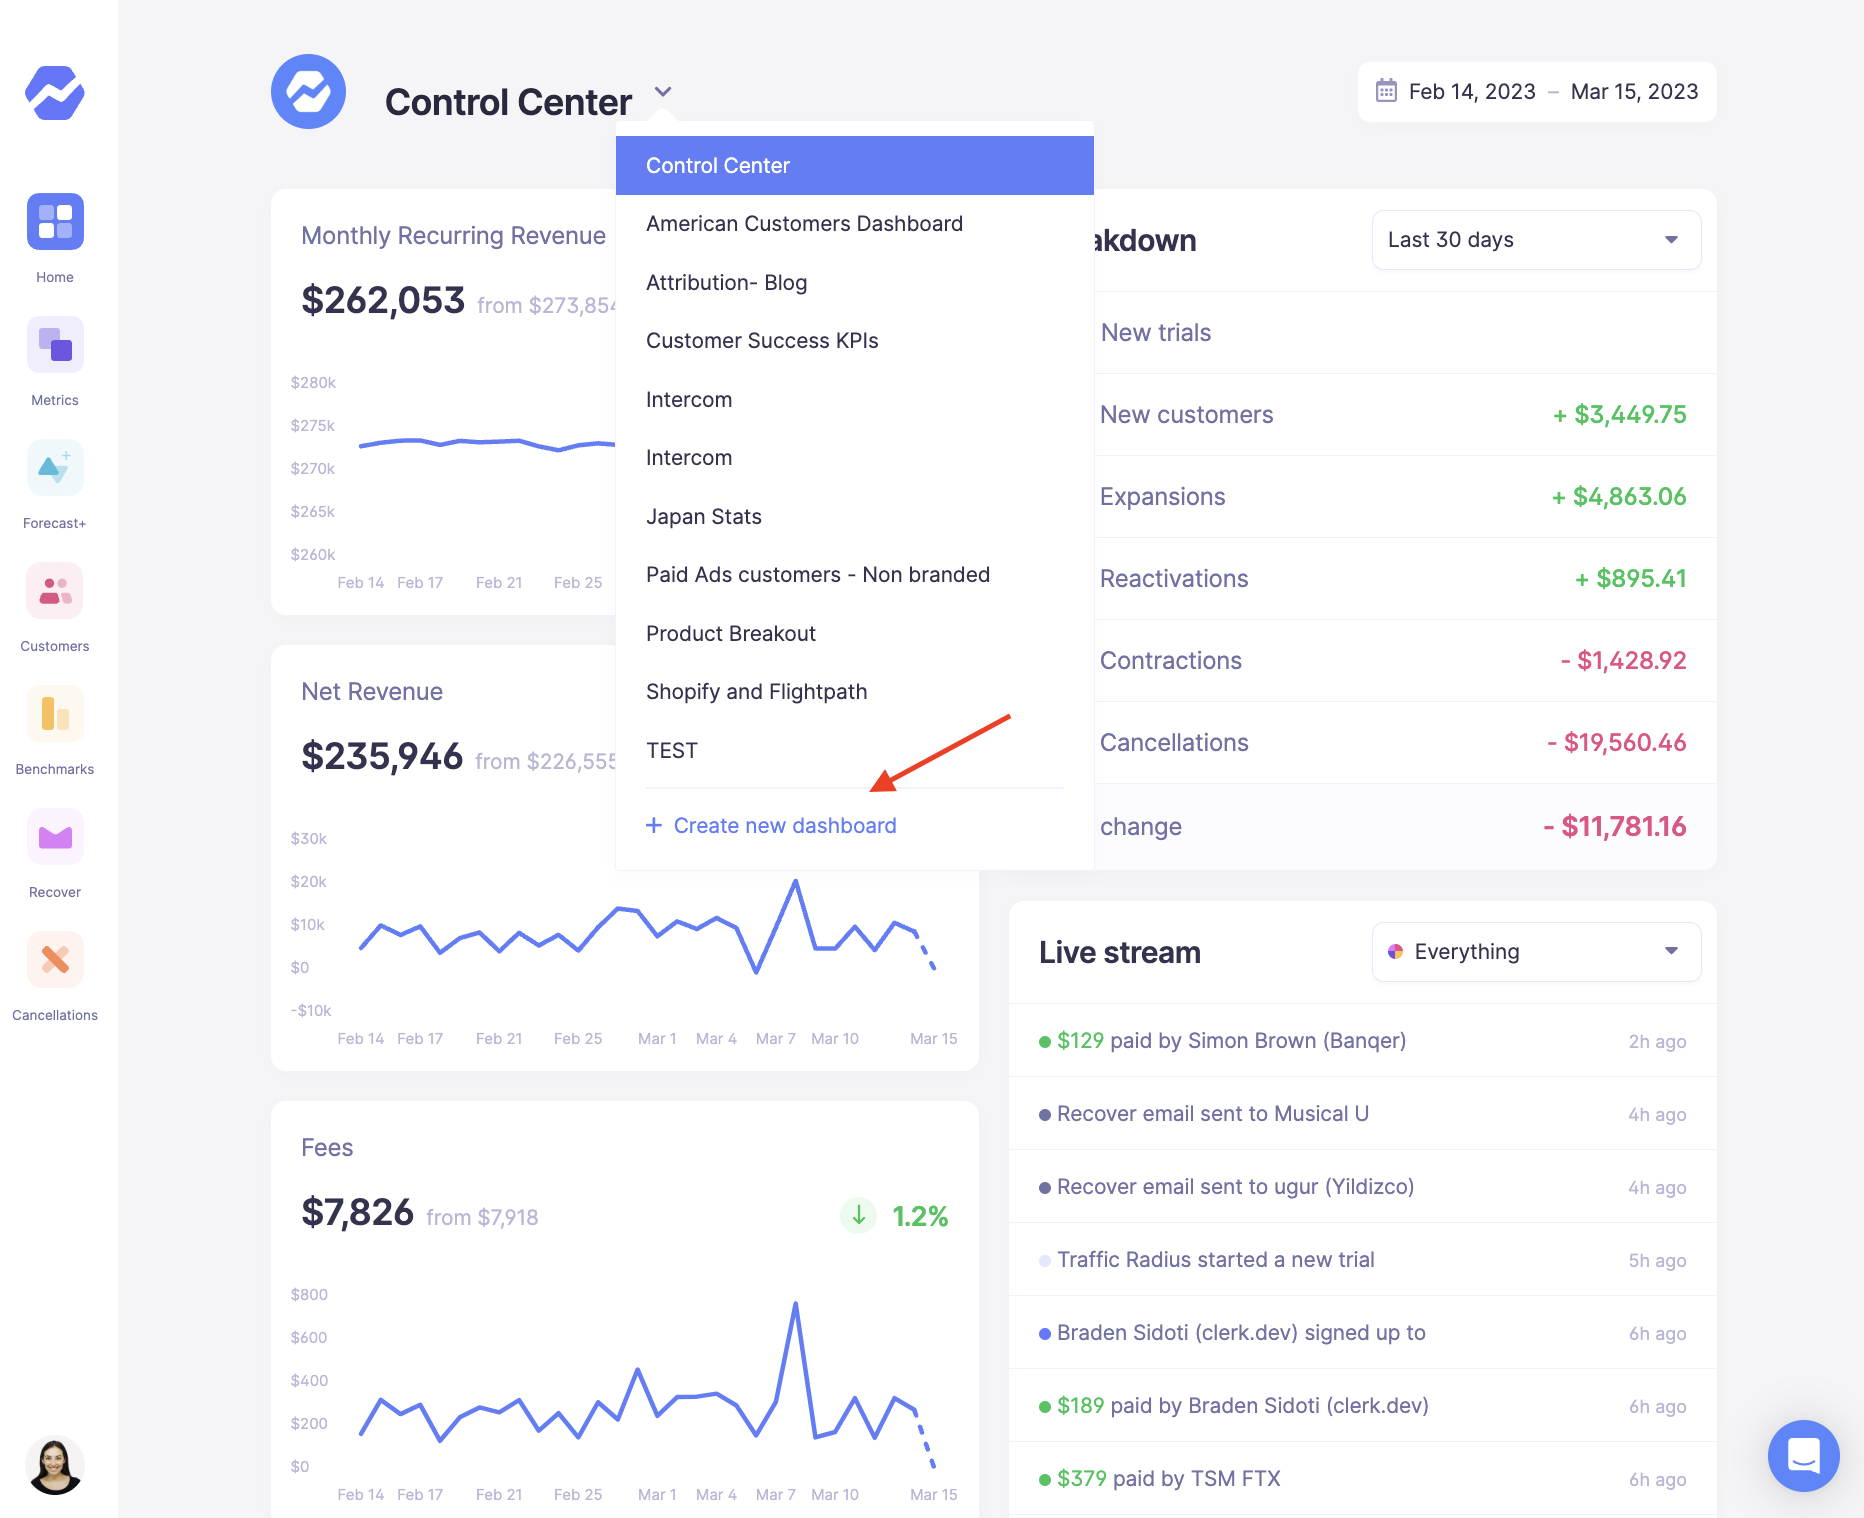
Step 3: Add your widgets
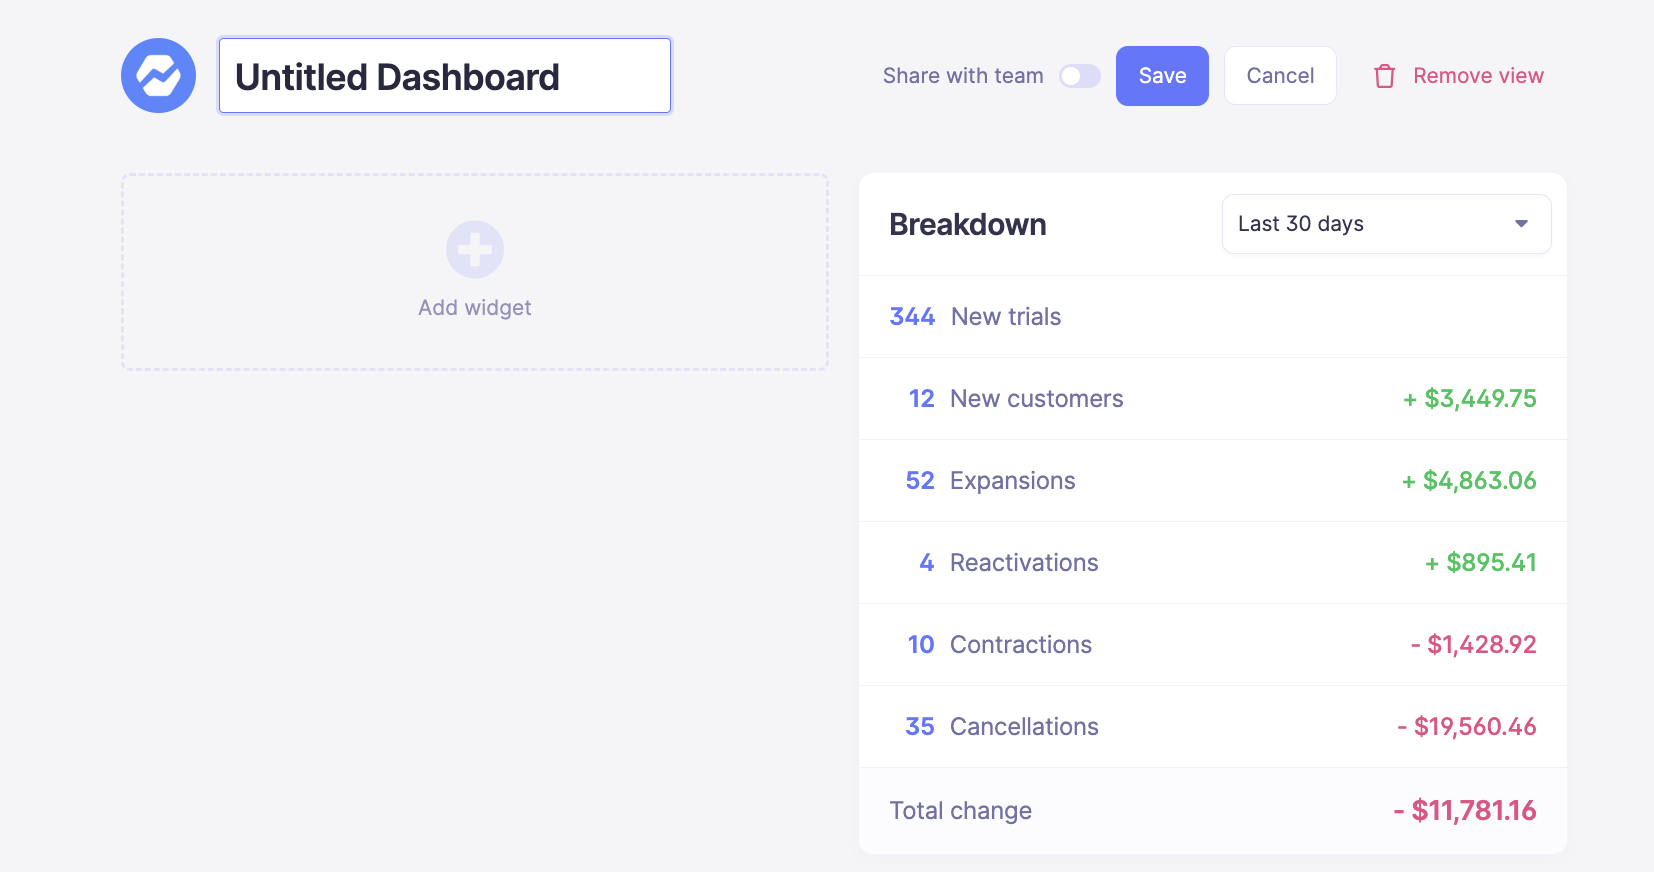
Step 4: Share with your team (or not!) and save.
Step 4: Connect your Intercom or Slack accounts with Baremetrics
You likely have data in a few different places and it’s time to bring the team together with Baremetrics.
Get important notifications in Slack, stay up-to-date with daily or weekly reports, and sync Intercom data back to create customer segments.
Step 1: Log into your Baremetrics account
Step 2: Click your account icon in the bottom left
Step 3: Click Slack or Intercom at the bottom left
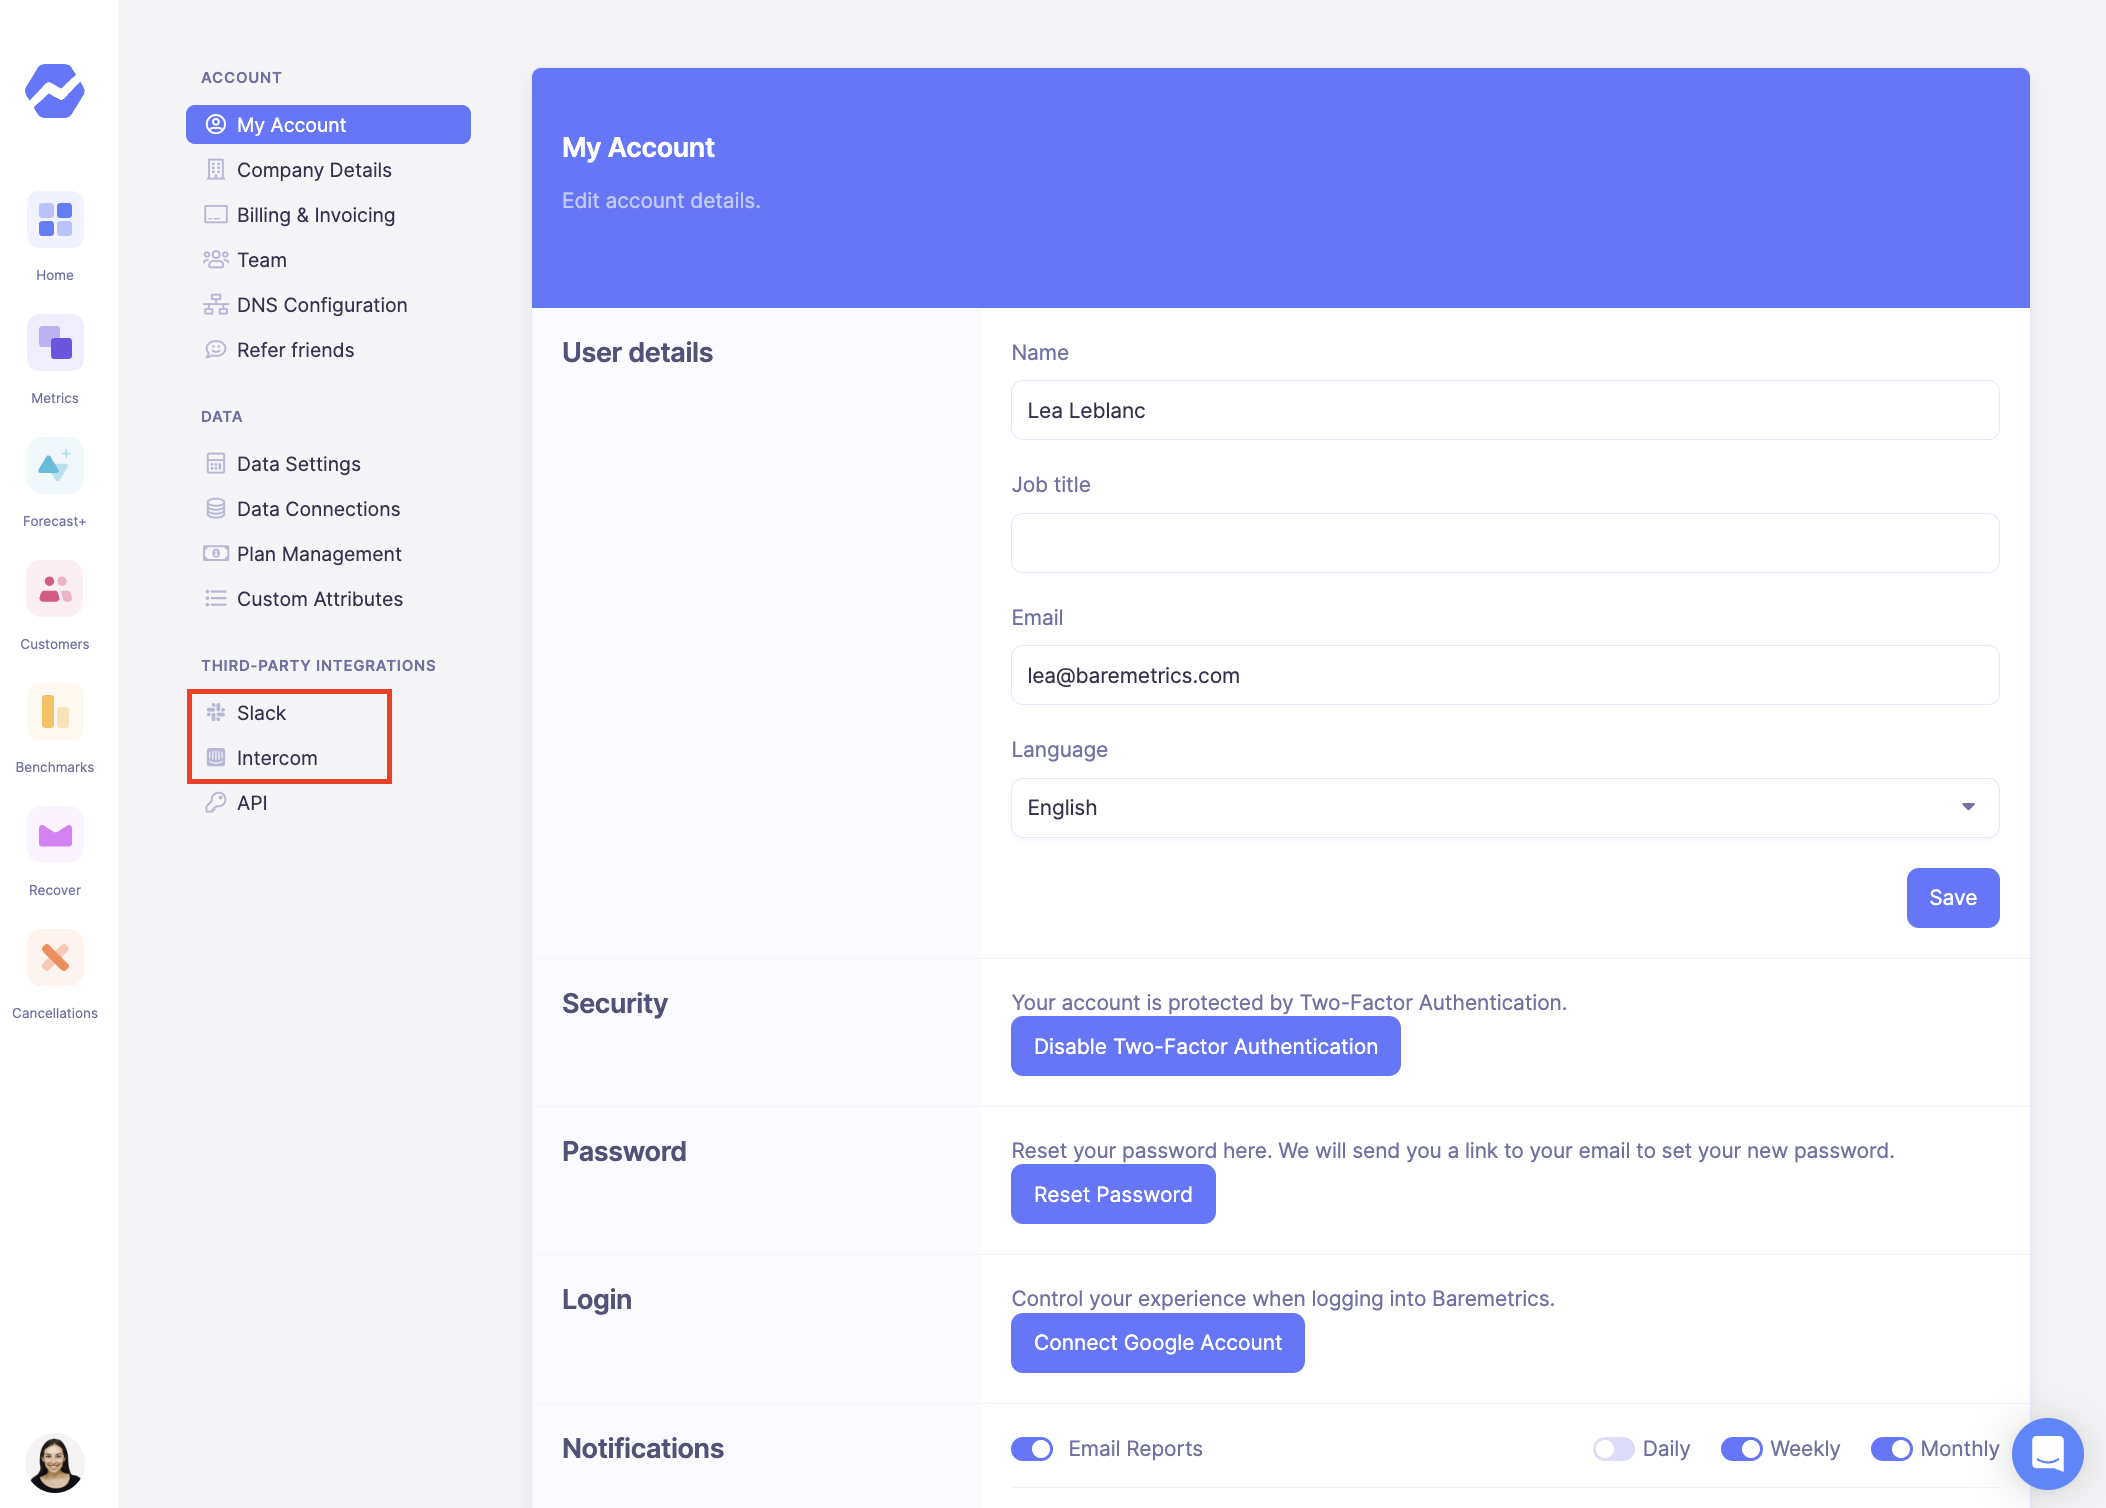
Step 4: Click “Connect”
Step 5: Follow the instructions on the screen
Step 5: Turn on Custom Notifications
Every single sign up or trial can be crucial for your company. You can’t afford to miss one. Setting up custom notifications in Baremetrics is crucial for making sure you don’t miss a beat.
Step 1: Sign into your Baremetrics Account
Step 2: Click your account icon in the bottom left
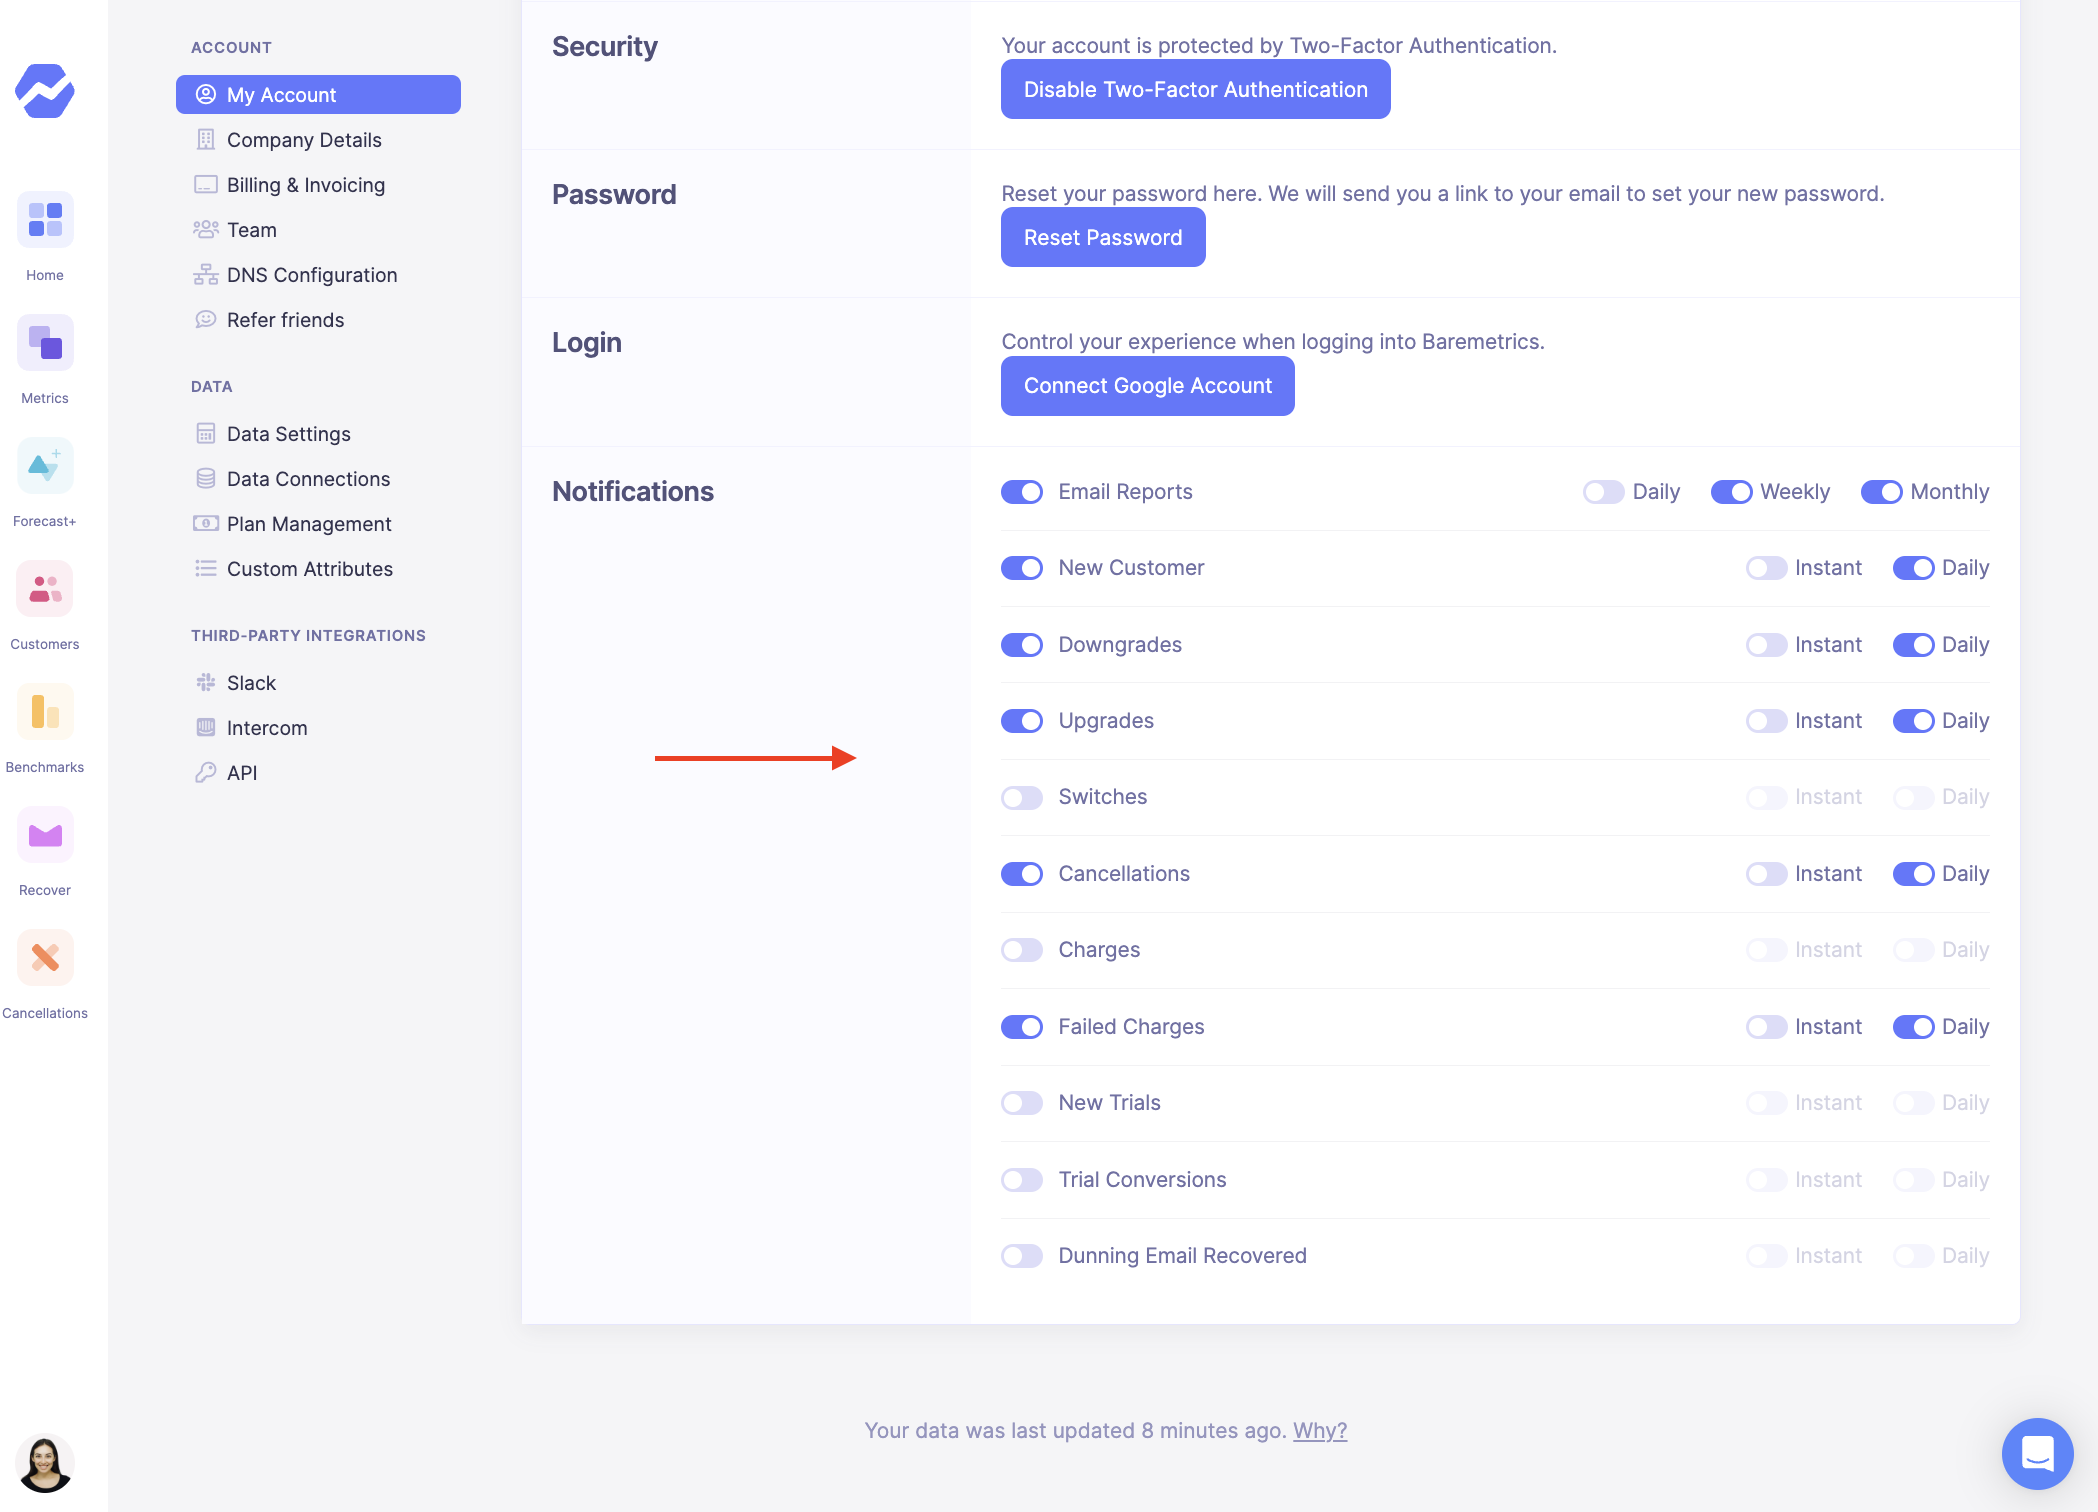
Step 3: Scroll to the bottom
Step 4: Simply toggle the notifications to customize what you get notified about and when.
Increase your ROI from Baremetrics with these two features
Earn back revenue lost to failed charges with Recover
Every month SaaS companies lose hundreds, sometimes thousands of dollars of revenue because of failed credit card charges.
But chasing customers down to update their credit card info takes hours you can’t afford to waste.

Recover by Baremetrics automatically nudges your customers to update their payment information before and after their payment fails through in-app notifications, emails, and paywalls.
Recover is a powerful feature that you can add onto your Baremetrics account, with just 15 minutes of set-up.
Begin your free trial here, or book a free walkthrough to get started.
Collect actionable feedback with Cancellation Insights
The only thing worse than losing customers is not knowing why they canceled. Churn is part of the SaaS game but if you don’t learn from it you won’t know what to fix.
Enter Cancellation Insights!
Cancellation Insights sends automated surveys to collect feedback from your customers when they cancel so you can prioritize where your team needs to focus in areas like:
🛠️ Fix what isn’t working for customers🧑🏫 Learn which customers just couldn’t be saved🏗️ Figure out what features you need to build next📊 Compare your cancellation reasons and see what’s costing you the most revenue!
Like Recover, you can add on Cancellation Insights to your Baremetrics account. Try it yourself here, or book a call with our team for hand-on help.

