Table of Contents
Automating the categorization of your recurring expenses will enable more accurate financial projections and faster closing of the books. It will also save time for your accountant that can be used for more value-adding work.
This post is part of a series for SaaS CEOs and Founders on organizing SaaS Chart of Accounts. The goal of the series is to provide practical advice on organizing and automating your financial backend, which results in more accurate forecasts and a faster feedback loop through a quicker closing of the books.
Bank Rules – The Basics
Bank rules pick up an expense description provided by your bank and use the fixed instructions you set to always categorize the expense under the same account. This helps you to:
- Reduce human error
- Override Quickbooks suggestion engine
Human error is particularly prevalent with outsourced accountants without a bookkeeper dedicated to your company. You might have noticed this if you ever see expenses ending up in one category in one month, and a different category in another.
Quickbooks suggestion engine can get things right once you have “trained” it a little. What remains a problem is the engine grouping all expenses from the same vendor under one account.
One of the most common mistakes that we see with SaaS Financials can be fixed with bank rules. This is, overstated hosting costs. The inaccuracy leads to lower gross profit margins, and thus lower LTVs and longer CAC Payback times. The reason for the error is often very simple – their bookkeeper lumps all expenses from Amazon under hosting (or worse, software). If the company buys their computer equipment, office supplies, and say, referral gift cards all from Amazon, suddenly this discrepancy becomes material.
If we use the bank rules, this error won’t occur as we can tell the rule to categorize anything with a bank description of Amazon Web Services to Hosting, but anything with Amazon.com or Amazon MKTPLACE to Office Expenses.
How to Use Bank Rules – Example
Let’s look at another common mistake where all expenses from Google have been applied to one expense category.
Your forecasting needs for Adwords, GSuite and Google Cloud are all very different, which is why you should also categorize them separately: Google Cloud is a hosting cost that increases alongside your revenue, whereas GSuite is an overhead software cost that grows as your team grows. Adwords, on the other hand, is a driver for your business, and grouping it with other expenses will make it impossible to accurately project your future revenue using advertising as a driver for growth.
For simplicity, we’re going to leave out Google Cloud from the example below.
Here is a view from the Quickbooks Online Banking section, which pulls your company transactions from your bank accounts and credit cards. We have two transactions – one for Adwords spend and one for GSuite subscription. Quickbooks suggestion engine thinks both of these should go to Software & Tools – G&A. While true for GSuite, this is inaccurate for Adwords.
To improve this, let’s look one level deeper. If we click on the first transaction, we can see something like this:
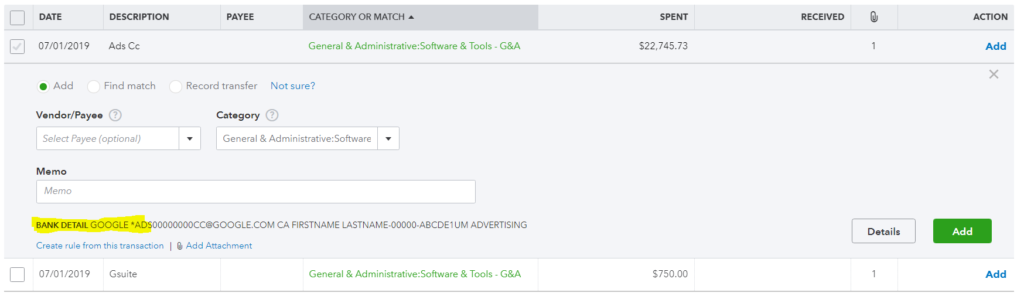
The Bank Detail (highlighted) displays a long line of text and numbers, but the first part – GOOGLE*ADS – is what we care about. Let’s use this information to create our first bank rule.
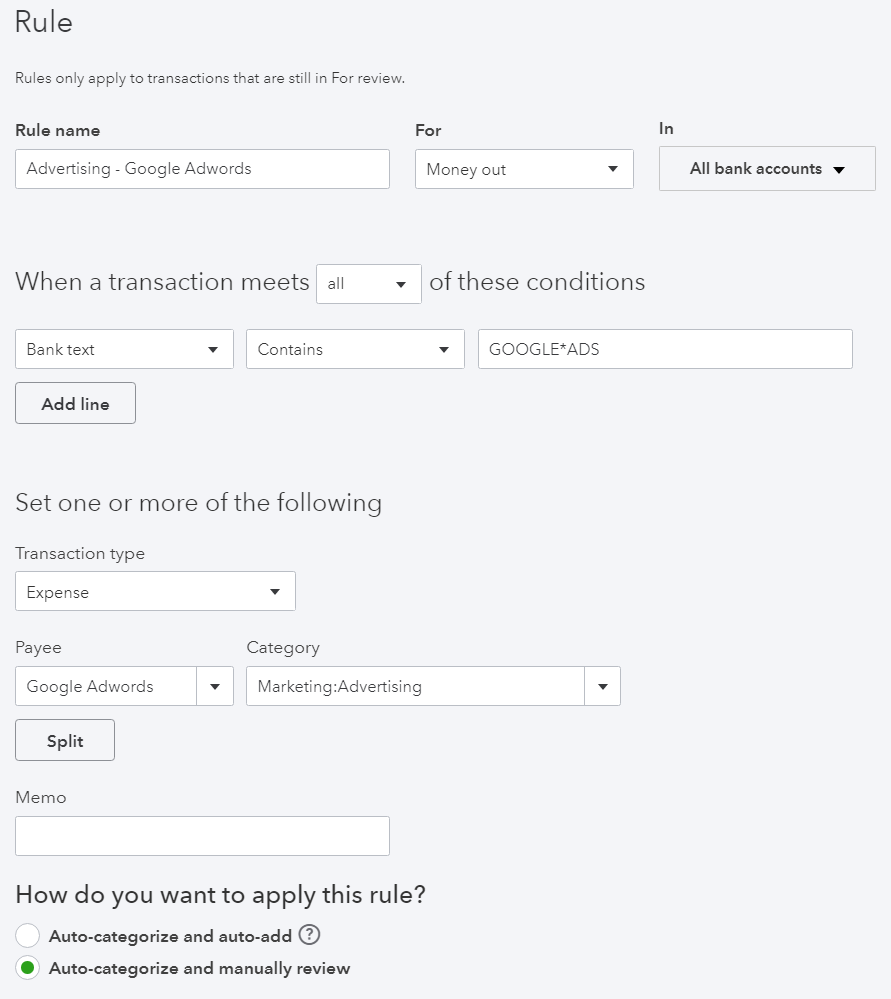
Navigate on the Rules tab on the top left, and select New rule. Here’s how we fill it in.
Rule name: Advertising – Google Adwords. I like to include the account, in this case advertising, in the rule name along with the company name as it makes the rules more searchable inside QBO.
For: Money out.
In: All bank accounts. (This will also include your credit cards by default).
Conditions: Select all, and use Bank Text from the available options. Now, take the same GOOGLE*ADS and write it to the empty field next to Contains.
Transaction type: Expense.
Payee: Google Adwords. Here you add the vendor. I prefer separating Google GSuite, Cloud and Adwords, as it gives me the ability to run more accurate vendor-level reports. I don’t really care how much I pay Google as a whole, but I do care how much our hosting costs are on Google vs AWS.
Category: Marketing: Advertising. Selecting the category means selecting the account to add this transaction into, every time. In this example, we would select the parent-category Marketing, and its’ subaccount Advertising. (You could even go a layer deeper, and select Google Adwords as a sub-subaccount.)
How do you want to apply this rule: Auto-categorize and manually review.
I don’t recommend using the auto-add, since it’s useful to have actual human eyes on each transaction. For example, you’d want to know as soon as possible if there appears to be a $10,000 transaction you expected to be just $10. With auto-add, it would take at least until the month-end review before noticing something is off.
After applying the rule, this is what we would expect to see.
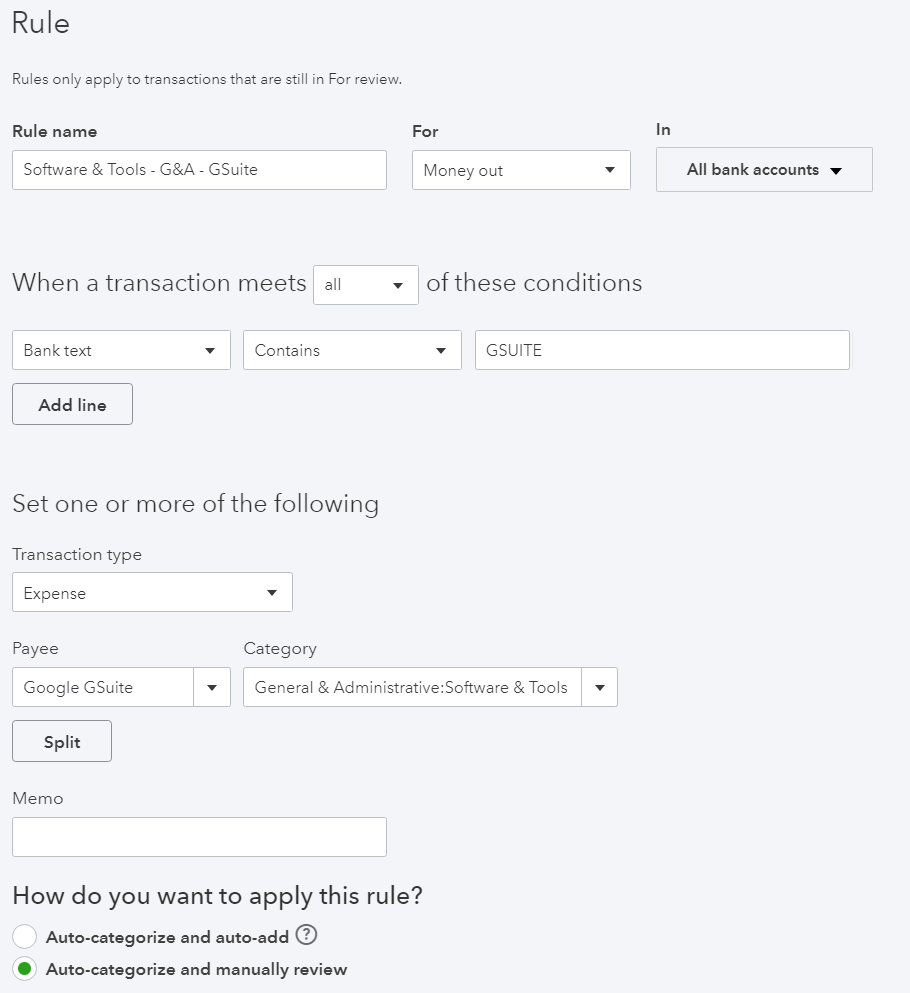
The first transaction has a green RULE tag before the Category, indicating that a bank rule determines the destination account. Let’s repeat the rule for the GSuite expenses. Navigate back to the bank rules, and fill in the following for the rule:
As a result, both of our transactions in the bank feed have been categorized with rules:
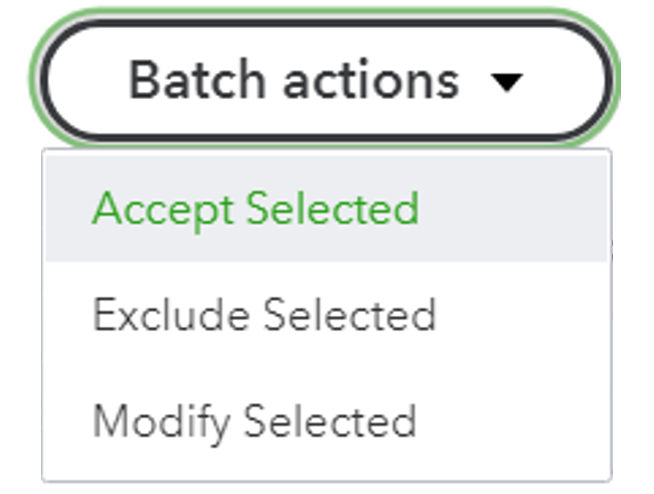
Now, select both transactions using the check boxes on the left, and use the Batch Actions tool to categorize both to their respective categories. This is a handy tool for selecting and accepting multiple transactions at once.
Additional Uses – Split
You could also use the bank rules to split given transactions. Say you have a loan payment of $1,000 per month but a variable interest which, per its’ name, changes each month . You could use the split tool to move the even $1,000 towards the loan balance on the balance sheet, and leave the remainder to go to the interest expense on Profit and Loss. You can also use %-based splits if you need to approximate certain transactions, say, across R&D, Sales and Cost of Revenue.
Takeaway
In this post we went through automating your SaaS expenses by using Quickbooks bank rules. The rules only apply going forward, so for any cleanup you’ll have to go to the Reviewed section under the Banking tab and select Undo for any transactions you want to categorize with bank rules. Just make sure not to undo anything that’s been already closed and reconciled by your accountant.
